An Amazon Basics speaker converted to a Rhasspy satellite
I needed a few text-to-speech announcement nodes dotted around the house, to work with my openHAB and Rhasspy based home automation system. The basic idea was to find a cheap, small speaker with decent audio quality for voice output, and drive it from an ESP32-based board with ESP32 Rhasspy Satellite firmware, or my fork of it.
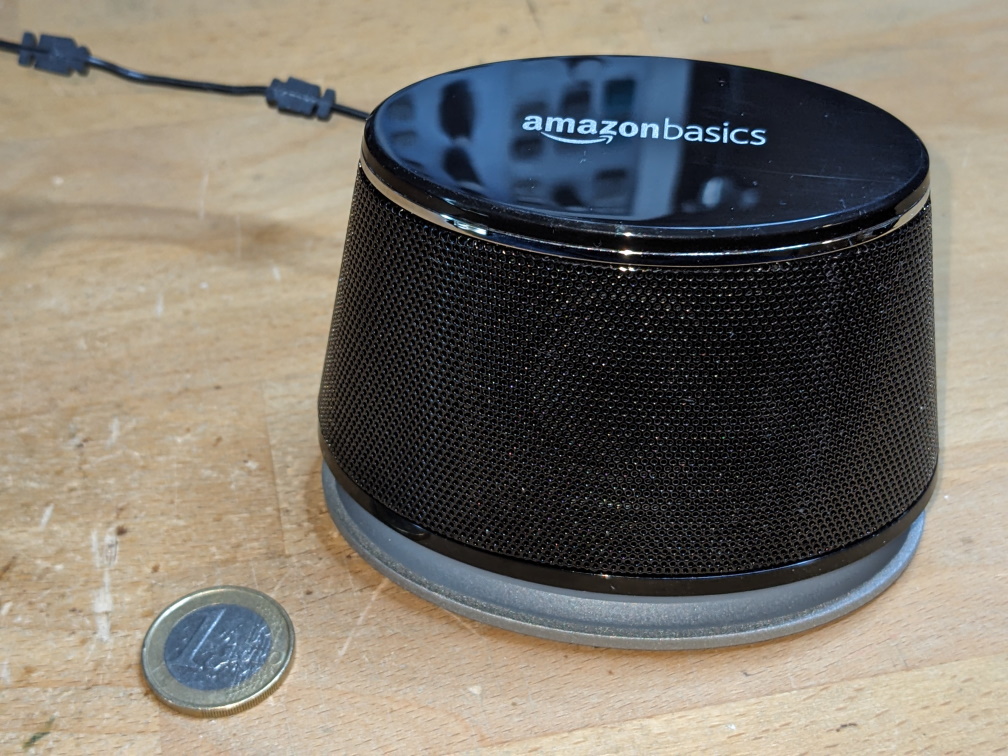
Amazon sells these cheap little speaker pairs called “Amazon Basics PC speakers”, which I used for the project. I find their audio quality good enough for the intended voice announcement use case. I bought this from amazon.de in Germany, it looks like the same speaker is also available from amazon.com in the US. It consists of one “active” speaker powered by USB, which has a little power amplifier PCB inside, and a second one that is a “passive” speaker driven by the first one. I used the “active” part for this one, and kept the “passive” one for another project.
This is part of my Rhasspy-and-OpenHAB home automation setup. For an overview, see this blog post.
Hardware
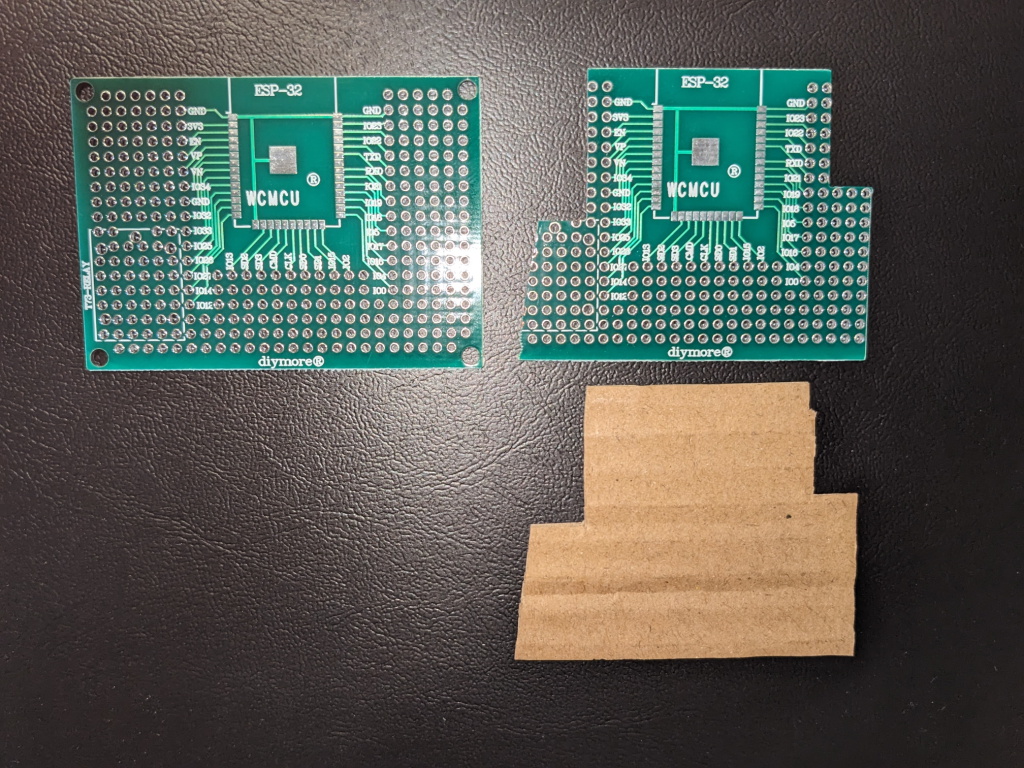
The first step is to open the speaker, remove all the hot glue they used to fix the little PCB, and then remove the PCB. In its place, I used a prototype board from Aliexpress that has a footprint for an ESP8266 or ESP32 module. The protoboard needs to be cut to have the same irregular shape as their little amplifier PCB. I made a cardboard template cut to size and used that to test the fit inside the speaker enclosure.
By the way, I flashed the firmware into the ESP32 module before soldering it to the prototype board (see below), any further improvements can then be downloaded later via over-the-air updates.
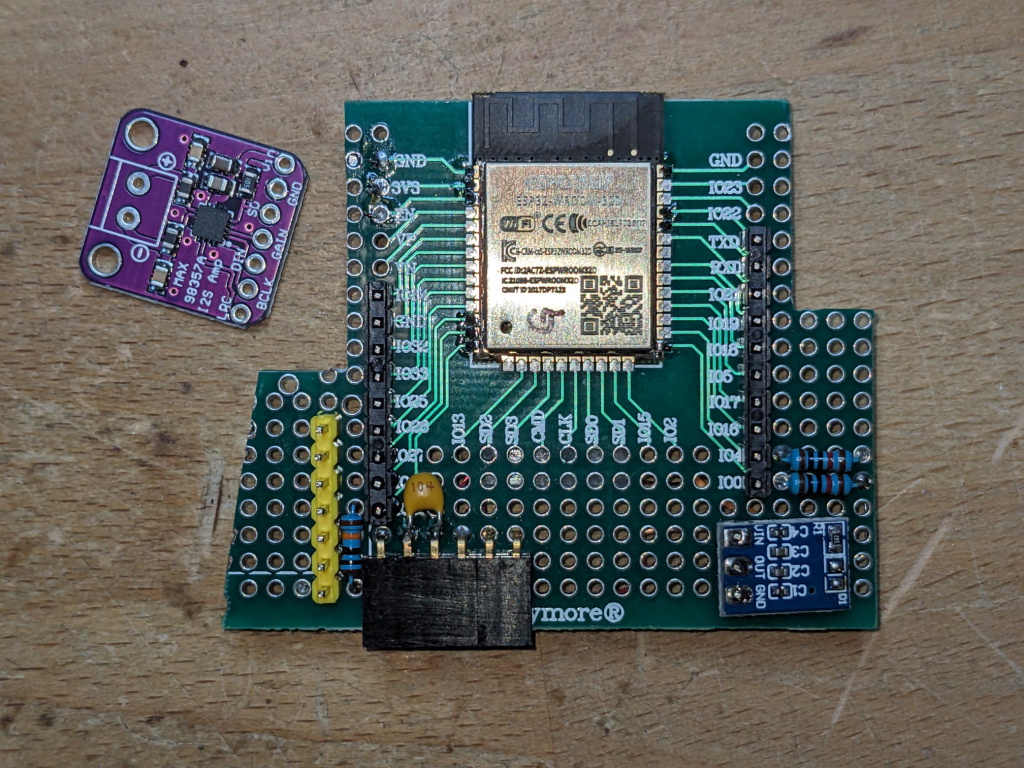
Next, assemble the electronics module. You need
- MAX58397A based module, D/A converter with 3W class D amplifier
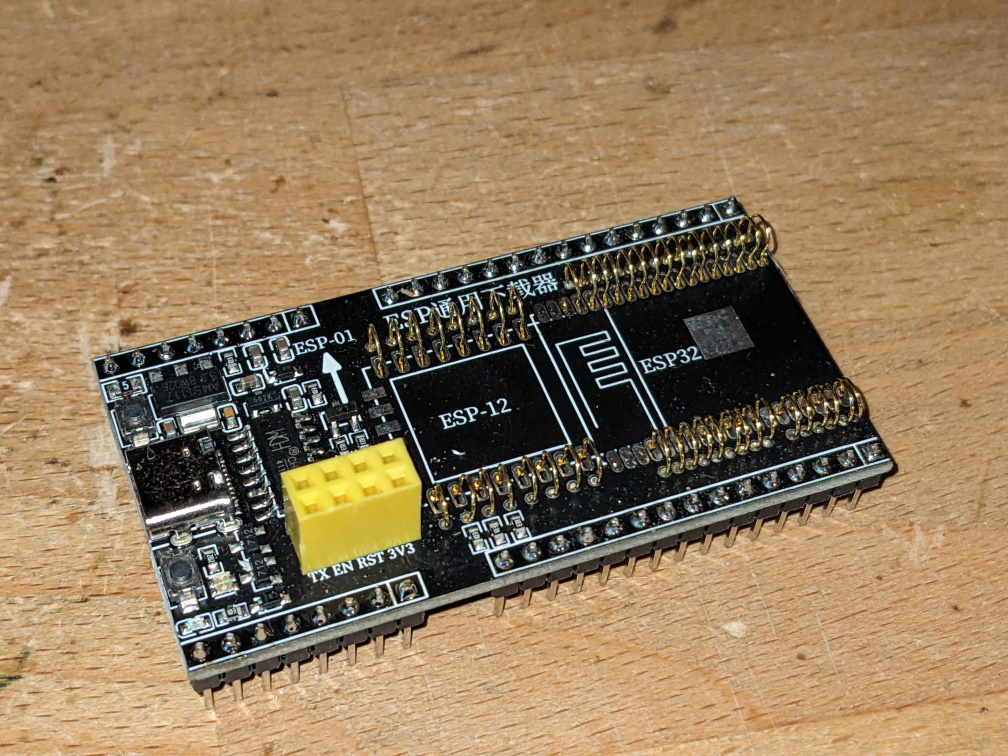
- ESP32 WROOM module, e.g. from Aliexpress
- 3.3V voltage regulator module
- a few resistors etc.
The schematics and complete bill of materials are available in Github.
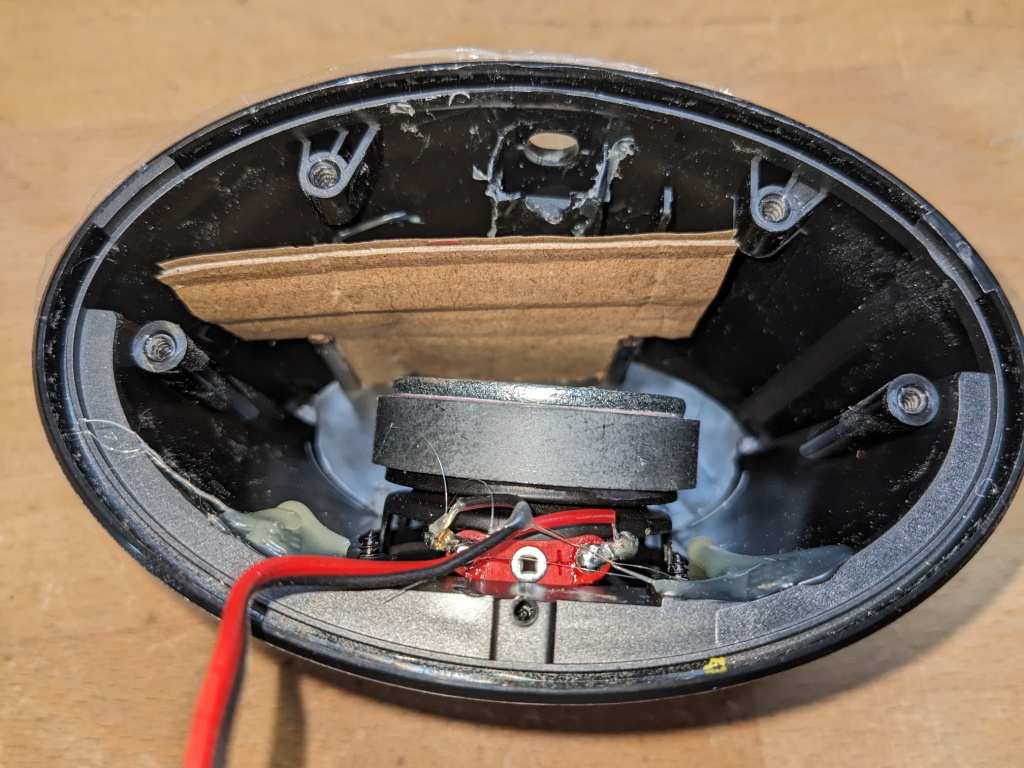
Begin by placing all components on the cut-to-size prototype board without soldering and slide it into the speaker enclosure to make sure everything fits nicely.

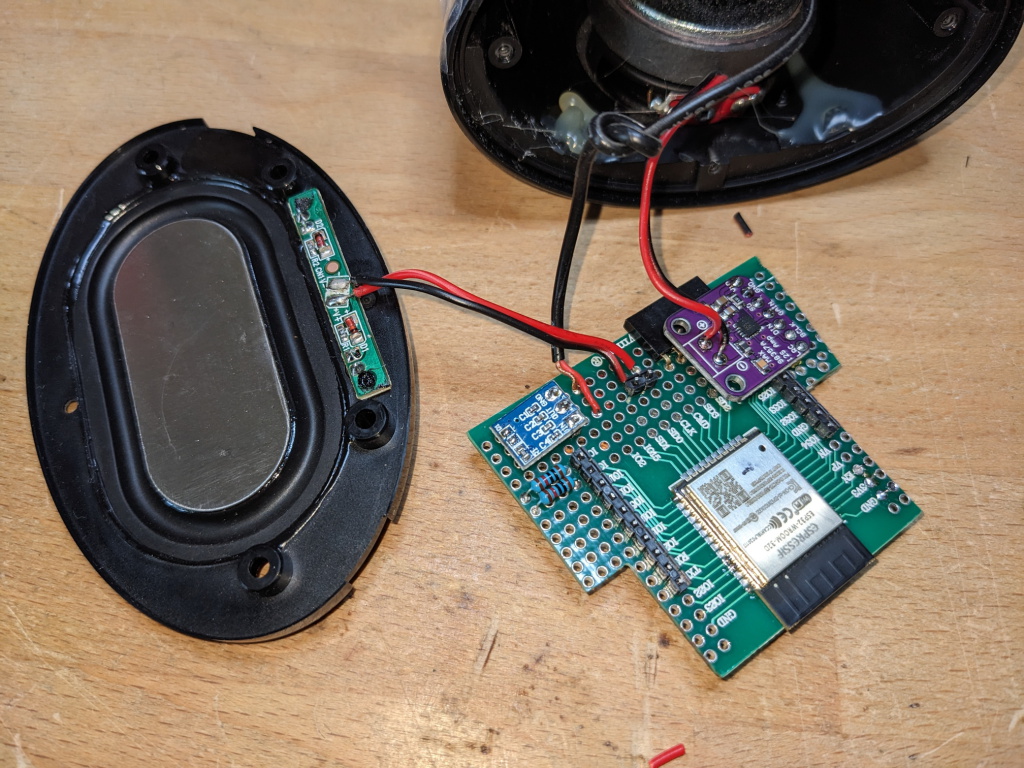
Finally, connect the leads from the speaker itself, from the LED module in the foot of the speaker, and from the USB cable that came with the speaker to the electronics module.
Theoretically, one could also connect a digital microphone to the ESP32 module, the firmware supports the INMP441 and similar models. I tried one from Aliexpress, but didn’t manage to position it in such a way that the sound quality was good enough for voice recognition purposes — I just don’t have the skills of an audio engineer.
Also, if you do want to use a microphone, the ESP32 module will continuously stream the audio signal to the Rhasspy server, and the voice recognition happens there. I didn’t like the idea of a continuous audio stream going through my Wifi network.
Software
Configure and compile the firmware
I downloaded the source code from Github and selected the inmp441Mmax98357a Platformio environment. I use Visual Studio Code with the Platformio extension.
I copied settings.ini.example to settings.ini and edited that as needed for my home automation setup. I don’t use static IP addresses in my home network, but I have a DHCP server configured to hand out predictable IP addresses to devices with a known MAC address.
[General]
hostname=ip-address-of-the-node
deployhost=127.0.0.1
siteId=the-siteId-I-want-for-the-node
device_type=4
network_type=0

[Wifi]
ssid=my-home-wifi-ssid
password=my-home-wifi-password

[OTA]
;supported: upload, ota, matrix
;-upload: device should be attached to computer via usb
;-ota: will use espota
;method=upload
method=ota
password=123
port=3232

[MQTT]
hostname=name-of-the-server-running-the-mqtt-broker-used-by-Rhasspy
port=1883
username=
password=
Flash the firmware
At the beginning, the firmware has to be flashed over a serial interface, which is done most easily before soldering the ESP32 module to the prototype board. For this, I placed the ESP32 module in a spring-loaded test socket that you can find on Aliexpress for a few Euros (search for “ESP8266 ESP32-WROVER Development Board Test Programmer Socket Downloader“). For this, the settings.ini file, section [OTA] must include method=upload.
Afterwards, you can change the code in your editor, and use over-the-air updates. For this, the settings.ini file, section [OTA] must include method=ota.
Configure the satellite
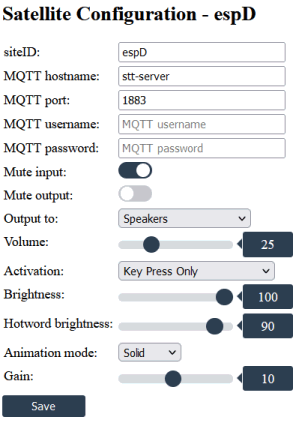
Once the ESP32 firmware is running, navigate to the configuration page at http://ip-address. On my build, I have turned off microphone streaming (Mute input = ON), and disabled remote wakeword detection (Activation = Key Press Only).
Last, browse to the settings page for your master Rhasspy server, typically http://rhasspy-server-name:12101/settings and add the siteId of your new satellite to the “Satellite siteIds” field in the “Text to Speech” section. If you have more than one satellite, list all of them, separated by commas.
If you also want to have a microphone in your satellite and use it for voice pickup, you must add its siteId name to more sections on the settings page, but I chose not to use that function, as explained above.
Conclusions
After using these units for about 6 months, I am still quite satisfied. They are small, inconspicuous, cheap and consume very little power, ca. 0.3W. The sound quality of the spoken announcements is quite good, using the “Larynx” text-to-speech engine in Rhasspy, with the “blizzard_lessac” voice.